The second factor was time. I am a lawyer and have very little spare time. I would have to use most of it for probably half a year to make this happen. Just as unpleasant, the plane would be down, that is disassembled and flyable, for months. I have never really gone that long without flying since I completed it in 2010.
The third was the wild card. There is an old saying - "If it ain't broke, don't fix it". This seems to especially apply to airplanes. Whenever you change something or upgrade something, you get a new problem somewhere else.
At Christmas time, Nancy and I made the decision to forego a fancy vacation this year and to buy the avionics. After much research and deliberation, I narrowed the choice down to the Avidyne IFD 440 and the Garmin GTN 650. Both, not coincidentally, were identically priced. Both had pluses and minuses. The Avidyne seemed to have a more intuitive user interface and had a terrific ability to display a slaved copy of the nav unit to an Ipad. The Garmin had better customer support, more ongoing software updates and a broader base of training.
On the other hand the choice between transponders was easy. The Garmin transponder was much more capable than the Avidyne unit. It had WiFi and would broadcast ADSB data and an AHRS to mutliple Ipads. Overall, the combination offered by Garmin was more appealing to me.
I ended getting the Garmin GTN 650 touch screen nav/com and 345R transponder. I was replacing a very slim SL30 nav/com with a much larger 650 so I no longer had room for a transponder in my radio stack. This ended up not being an issue, since the remote transponder can be controlled through the 650.
I shopped between multiple avionics shops for installation prices. They wanted over $7,000 just to install and program the units. Having built the entire plane, I was not willing to accept this and, with some trepidation, decided to do it myself.
I hedged my bets by purchasing a custom wiring harness from Approach Systems. Owner Tim Hass has gotten rave reviews from many pilot friends for his pricing and customer service. I ended up buying the radios and wiring harness from him for about the same price as the radios alone from the avionics shops.
While the plane was down, I decided to make some other upgrades. I am adding new upgraded rudder pedals, elevator fairings, door trim, soundproofing, an upgraded compass, air seals to improve heater performance and reduce noise and more.
I will post some pictures of the first part of the process here and continue to update the progress until I am back in the air in late April.
________________________________________________________________
Here is my panel before the changes. It is very capable, and has been good enough for me to fly all over the country as well as to Canada and the Bahamas, but it has no certified GPS and no ADSB Out.
__________________________________________________________________
The back of the panel is a lot less user friendly looking. There is very little space and a LOT of wiring.
____________________________________________________________
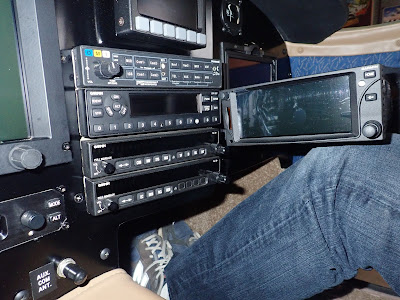
Here is the new GTN 650 nav/com I'm installing. I'm holding it next to the GTX 327 transponder and SL30 nav/com that it will be replacing in the stack. I will be keeping the SL40 com on the bottom as a backup radio. This will leave about a 1/2 " space on the bottom that I'll have to find a way to fill.
_________________________________________________________________
The panel with the radios removed. I hate taking this apart.
__________________________________________________________________
I removed the custom radio rack from the plane, pulled the radios and brought it back home to my workshop to reconfigure it for the new radios.
_________________________________________________________________
Here it is after reconstruction with the new radios in place. I think it looks pretty good. That's about $18K in radios sitting there.
__________________________________________________________________
I made a spacer plate out of fiberglass and match painted it.
__________________________________________________________________
Here is the new radio stack installed. It looks great, but there is a big space under the bottom radio.
_____________________________________________________________
Close up view with the spacer installed under the bottom radio. It looks perfect.
____________________________________________________________
Having this many gadgets means having lots of antennas. The new GTN 650 would add a big new GPS antenna. This wouldn't fit on my antenna rack on the canard. This already held GPS antennas for the Grand Rapids EFIS, the Avmap moving map and the Radenna Skyradar ADSB in system as well as the ADSB antennas and processor underneath.
Time to fabricate a new antenna mounting rack.
_________________________________________________________________
I decided to make the new rack out of fiberglass. Here are some pictures of the construction process.
 |
| Cardboard form covered with duct tape |
 |
| Single 4 ply layup of glass for the structure |
 |
| Glass laid up and held in place for cure |
 |
| After cure, ready to remove temporary forms |
 |
| Cured rack ready for finish and trim |
 |
| Trimmed up and taking shape |
 |
| Using templates for mounting holes |
 |
| Marked up and ready to drill |
 |
| New antenna installed and others ready to mount |
 |
| Nice undermount for Skyradar |
__________________________________________________________________
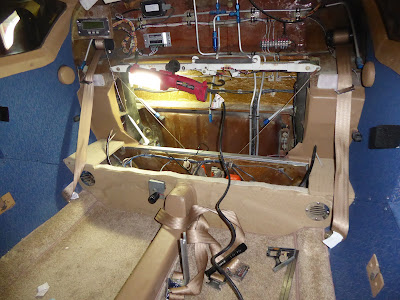
Next up is the transponder. I have to find a place to mount this so that it will be perfectly level and aligned exactly with the direction of flight. I try everywhere before settling on the spot in the back behind the vanity panel and under the floor of the baggage compartment. I will have to remove the interior and the seats to get it there and move the ELT currently mounted in that spot.
 |
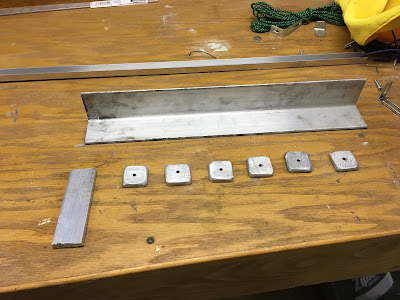
| First step, fabricate feet and hardpoints from angle and bar stock |
 |
| Completed feet |
 |
| Feet and hardpoints mounted on transponder rack |
 |
| Access to the new location cleared |
 |
| Spacers fabricated to level the mount |
 |
| Transponder and ELT in their new locations |
Next, a new compass. I had always hated my leaky, inaccurate wet compass. I finally bit the bullet and bought a dry vertical card flush mount compass. It is more accurate, more intuitive to interpret, lighted and only quadruple the price of the old one.
 |
| Crappy old compass |
 |
| Nice new compass - much better |
While I'm back there, I replace the ELT battery and the battery in the remote switch on the panel. Now I'm good until late 2022.
There's still lots more to come. I will be adding the items below.
 |
| Elevator fairings |
 |
| Upgraded door trim |
 |
| Soundproofing |
 |
| Rudder pedals and new fuel flow sensor (far right and left) |
More improvements coming soon.
_________________________________________________________________


1 comment:
Mark, you will get much more utility once you are IFR, so good choice!
Post a Comment